Setup
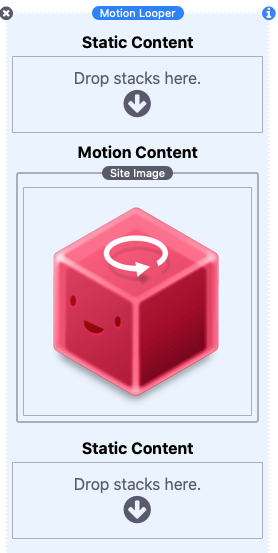
After adding the stack to your stacks page, add any content that you want to animate to the “Drop stacks here” section. In our example we will be using an image and creating a bounce animation that only activates on hover.
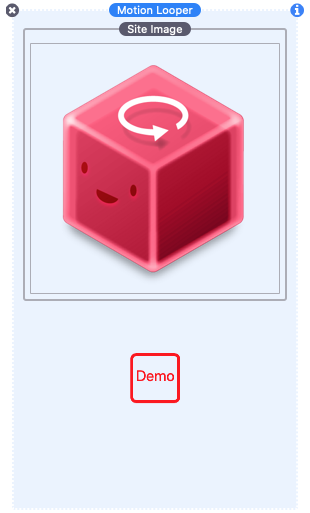
The red square below the image shows a demonstration of the animation according to what has been defined in the settings panel. You can refer to it as you make changes.
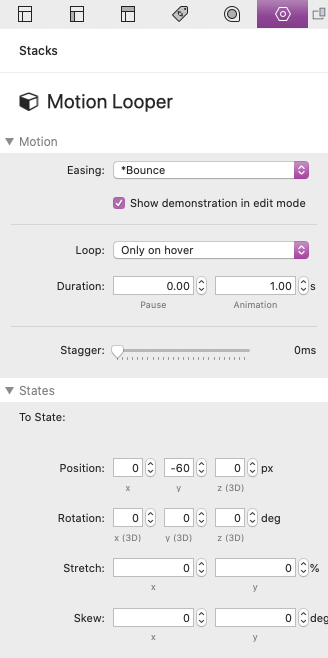
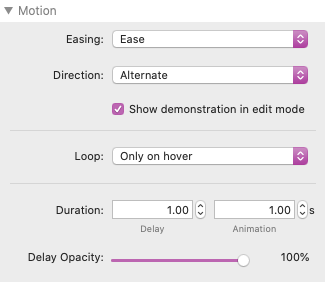
In the settings panel change the Easing option to *Bounce. Options that begin with an asterix “*” disable some of the settings as they do not apply to these easing options.
Next change the Loop option to Only on hover. This will make it so the animation only activates when a mouse cursor is directly above the stack.
After that change the Duration “Pause” value to 0 and leave the “Animation” value at 1 second. This will remove the pause between animations.
In the settings panel section labeled States, adjust the Position y setting to -60px. This will make the animation move the stack up 60 pixels from its default position.
Switch to preview mode and hover the stack with your mouse cursor to test the animation. You may notice that the stack is being clipped during the animation.
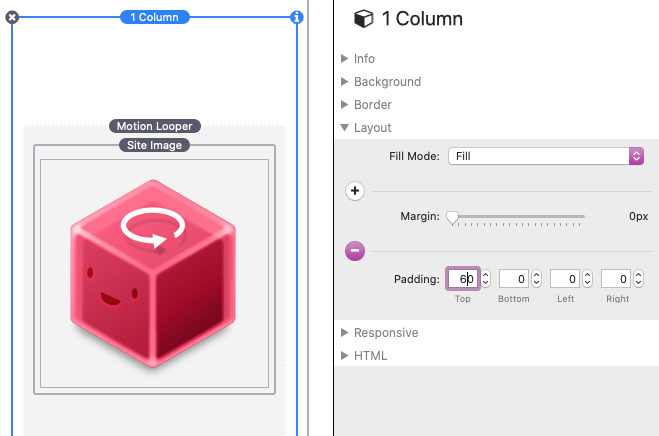
If this happens, it is because Stacks pages prevent stacks from overlapping other content. Padding needs to be applied in the direction of the animation equal to the distance set in the Position y setting to give the animation enough room to animate. To do so, switch back to edit mode and add a single column stack and add 60px padding to the top of it. Then move the Motion Looper stack inside of the single column stack.
Note: You may instead simply add Padding to the image stack itself, but it will change how the stack animates with any 3d position settings as that padding will be added to the overall size of the stack instead of above it.
Switch to preview mode to see the completed animation.
Settings Panel
Easing: Select from 10 different options that modify the animation’s acceleration curve so that the speed varies over its duration. Linear is robotic while the rest mimic realistic motions.
Direction: Select whether the animation should play forwards, backwards, or alternate back and forth between the two states (The states are defined in the “States” section below).
Show demonstration in edit mode: Disable this to hide the red demo square.
Loop: Select when and for how long the animation plays or stops/pauses.
Duration: Define in seconds the pause interval between animations and how long the animation takes to complete. Animation duration will effectively adjust the speed of the animation.
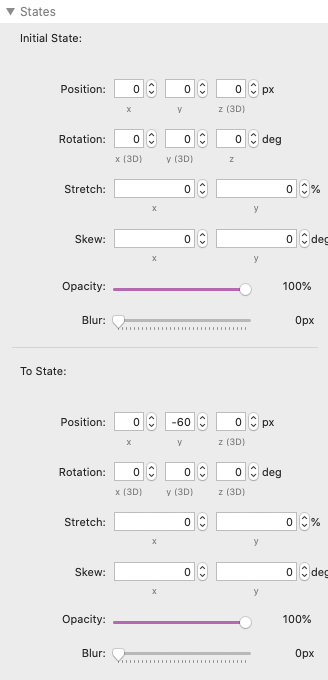
Initial State: The default position of the stack. When the animation stops or pauses, the stack will return to this position. These values will in most cases be left at 0.
To State: The position the stack will animate to.
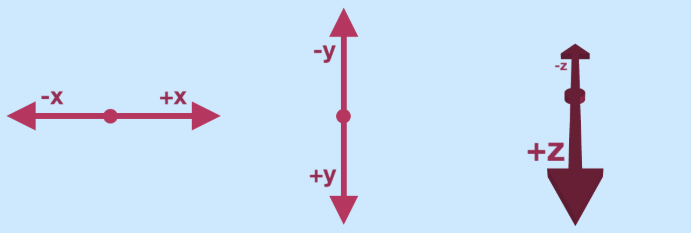
Position x: Define the horizontal position of the stack. A negative value will move the stack left while a positive value will move it right.
Position y: Define the vertical position of the stack. A negative value will move the stack up while a positive value will move it down.
Position z: Define the 3D horizontal position of the stack. A negative value will move the stack further away while a positive value will move it closer.
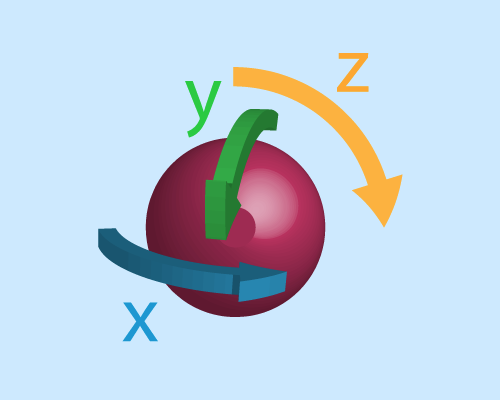
Rotation x: Define the 3D horizontal rotation of the stack in degrees 0-360.
Rotation y: Define the 3D vertical rotation of the stack in degrees 0-360.
Rotation z: Define the rotation of the stack in degrees 0-360.
Stretch x: Define the width of the stack by percentage. A negative value will thin the stack while a positive value with thicken the stack.
Stretch y: Define the height of the stack by percentage. A negative value will shorten the stack while a positive value will heighten the stack.
Skew x: Define a horizontal skew distortion by degrees.
Skew y: Define a vertical skew distortion by degrees.
Opacity: Adjust the transparency of the stack.
Skew y: Apply or adjust a blur effect given to the stack.
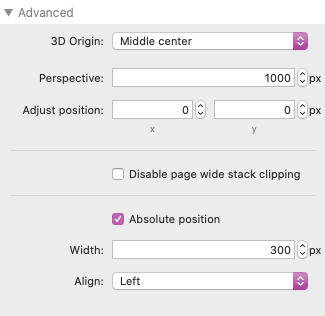
3D Origin: Select the point around which the 3d position is applied. See an example of each here.
Perspective: Define the 3D perspective in pixels. This value represents the distance between the user and the z=0 plane. The z=0 plane is the plane where everything appears in a 2-dimensional view. The greater the value, the further away the perspective of the user is.
Adjust position: Define the x and y position of the stack. These values adjust the position of the entire animation. Use this setting to make adjustments to the overall position of the stack.
Disable page wide stack clipping: Enable this to allow elements on the entire page to over lap with each-other. Use this option if you are having issues with the animation clipping. Note: This setting will adjust the entire stacks page and may result in undesirable effects.
Absolute position: Enable this option to place the stack above other static content. Once enabled, new stacks sections will appear above and below the Motion content. Content placed in these sections will not be apart of the animation.
Width: Define the width of the absolutely positioned Motion content. This option is only available when Absolute position is enabled.
Align: Select the horizontal alignment of the absolutely positioned Motion content.